
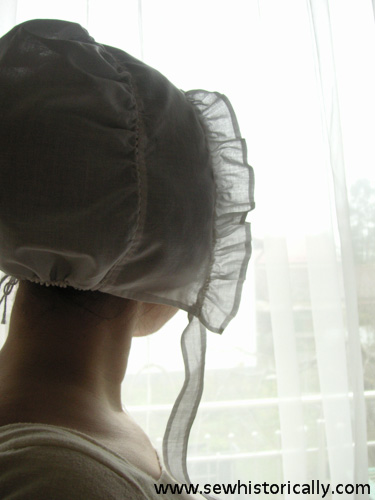
In this tutorial I’ll show you how to sew an authentic 1840-1850s plain cotton day cap by hand.
In the early- and mid-Victorian era, all women covered their heads with caps during the day; whereas in the later part of the Victorian era, just married women and elderly ladies wore caps. These caps were usually called morning caps or day caps. For rich ladies, day caps could resemble a piece of lace trimmed with silk ribbons and flowers; while a middle-class woman or a servant would choose a plainer cotton day cap, such as the one I’m sewing here (1860 painting). A similar cap is described in the The Workwoman’s Guide (1840, p. 65) as ‘pretty and not expensive’.
Such a cap might also be worn as a bonnet cap which was worn under bonnets with just the cap frill looking out from under the bonnet. In the night, night caps were worn: ‘The border must depend upon the purpose for which the cap is intended: if for a night-cap, a double border in front and single behind will be required: if for a bonnet-cap, a double border or quilling only, in front will be sufficient.’ (The Workwoman’s Guide, 1840, p. 65)
Women’s day caps are made of clear, spotted, sprigged, twilled, or jaconet muslin with frills of cambric, muslin, net, or Valenciennes lace; and night caps of checked muslin or soft fine calico. (The Workwoman’s Guide, 1840, p. 61ff) Here are pictures of caps and patterns (The Workwoman’s Guide, 1840, plate 9), and some more pictures and patterns of bonnet and other caps (The Workwoman’s Guide, 1840, plate 15).
In the 1830s, the ruffle was gathered evenly round the brim (1830s cap), while in the 1840s and 1850s the frill was gathered more at the sides (1840-50s cap): ‘The form of the caps, both for the morning and evening costume, are very plain upon the top of the head and full at the ears’ (1843, Godey’s Lady’s Book). 1850s day caps exposed more of the front hair than earlier caps (1855 painting and 1859 painting).
Materials:
- white, thin cotton fabric, such as batiste
- white cotton sewing thread
- needle and scissor
- awl or something similar, such as a knitting needle
- cotton string
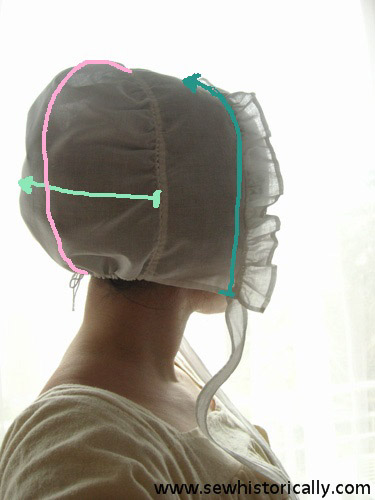
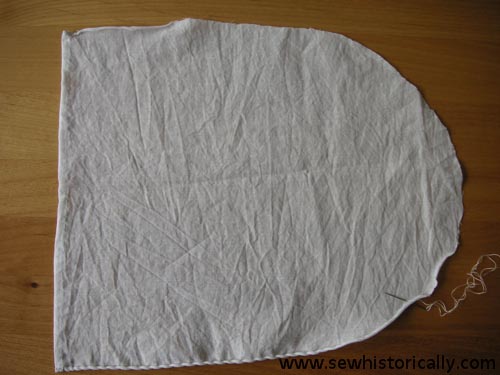
Measure round your head from below ear to below ear (the petrol-blue line). Decide how wide you want your brim piece. My finished brim piece (without seam allowance) measures 8,5 x 50cm. Then make a bun at the back of your head: higher for the 1840s and lower for the 1850s. Measure loosely across the bun from the crown-brim-seam to the crown-brim-seam on the other side (the mint green line). Then measure loosely from the top of the crown piece to the bottom (the pink line): the cap should roughly cover your neck hairline. My crown piece measures 25 x 29cm. Round the top corners like here: The Workwoman’s Guide, 1840, plate 9. Decide how long (you should be able to tie them into a bow) and wide you want your cap strings (some Victorian cap ties are very narrow, while other are wide). My tapes measure 2,5 x 38cm and my cap ruffles 3,5 x 85cm. That was the difficult part of the day cap making, 😉 the rest is easier. 🙂 If you want you could sew a test cap with cheap fabric on your sewing machine to verify that your pattern fits you.
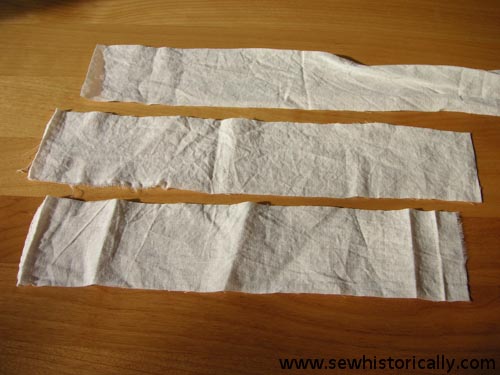
Cut strips of the cotton fabric for the cap frill and ties.
You could also omit the ruffle (plain cotton cap without frill) or use lace or bobbinet tulle instead (Valenciennes lace day cap).
Sew a narrow hem with tiny running stitches at all four sides of the cap ties.
Hem just three sides of the frill.
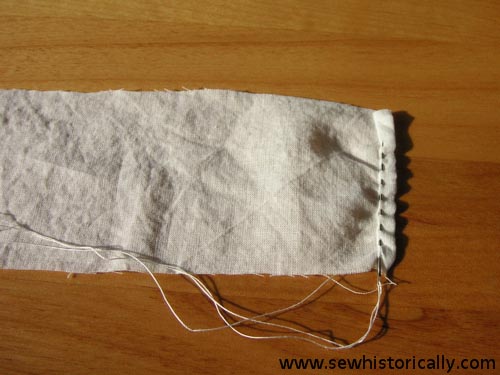
Leave one long edge of the cap ruffle strips unfinished for now.
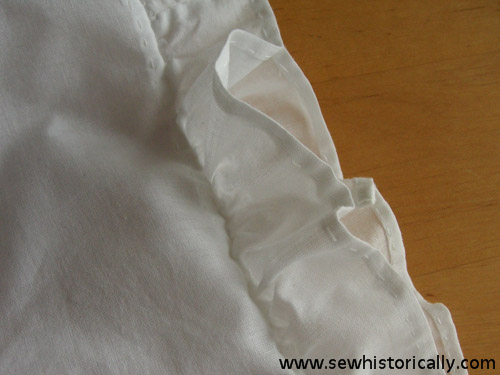
If your strips for the cap frill aren’t long enough, join them with small French seams after hemming. (Close-up of hem with running stitches and ruffle joined with french seams (enlarge the picture))
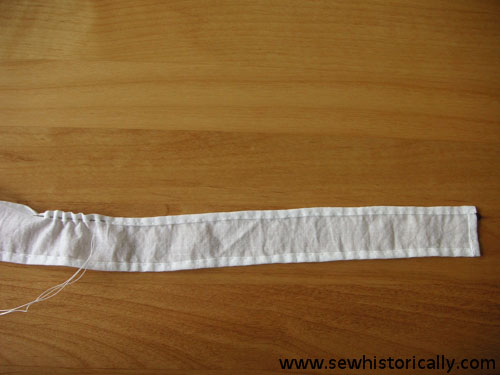
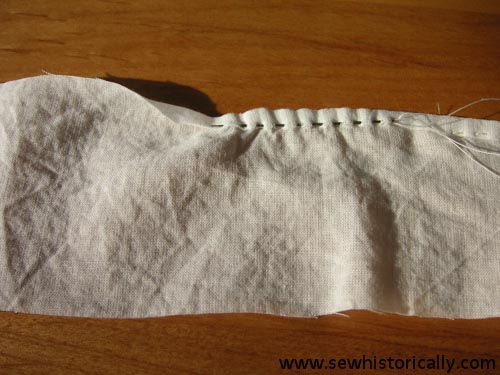
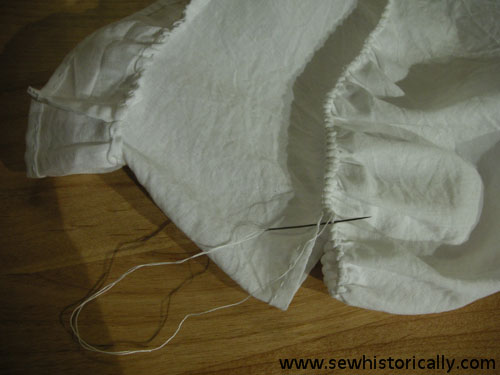
Finish the unfinished edge of the frill with rolled whipped gathers. ‘Whipping is forming gathers by overcasting a rolled edge of fine material, and drawing up the thread.’ (source)
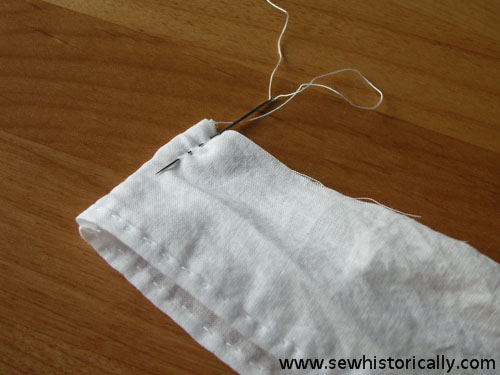
Cut out your crown piece, sew rolled whipped gathers round the curved edge, and hem the bottom of the crown. But prior to hemming …

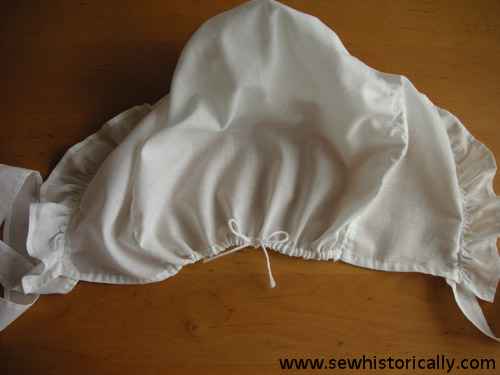
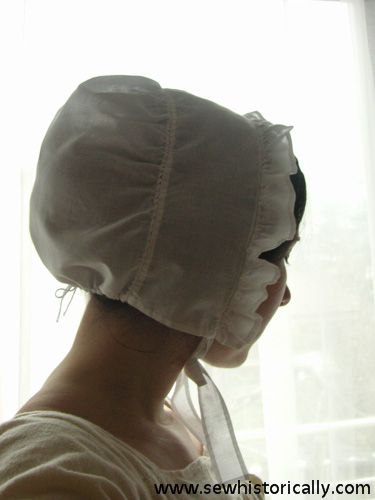
… sew two eyelets in the middle for the drawstrings.
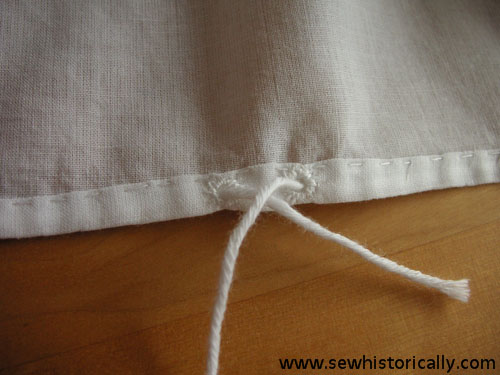
After hemming, the eyelets should be on the outside of the cap, as in the picture above.
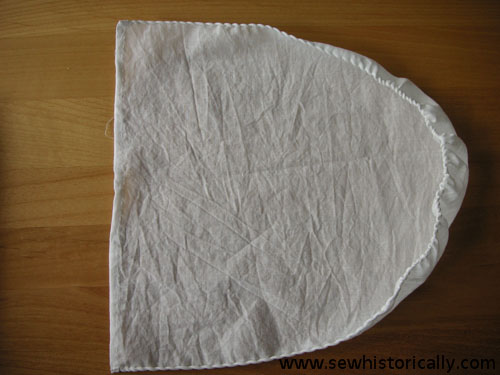
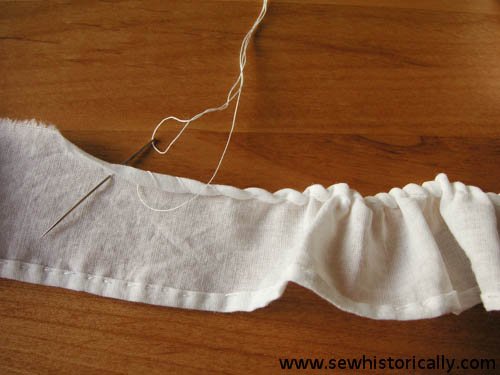
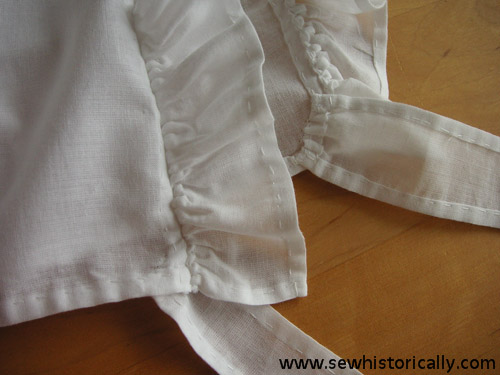
Gather the crown at the top till it fits the brim piece.
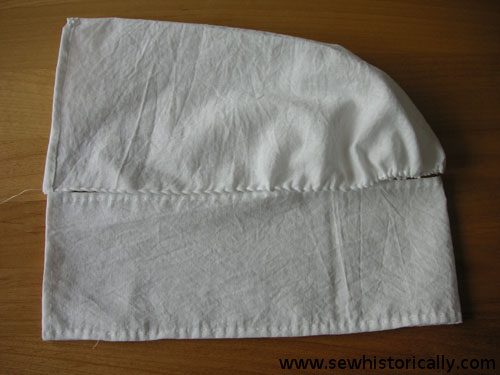
Attach the crown to the brim with tiny overcasting stitches. Here’s a 19th c. lady’s cap with the crown attached to brim with rolled whipped gathers.
I found it worked better to sew the overcasting stitches from the wrong side of the cap.
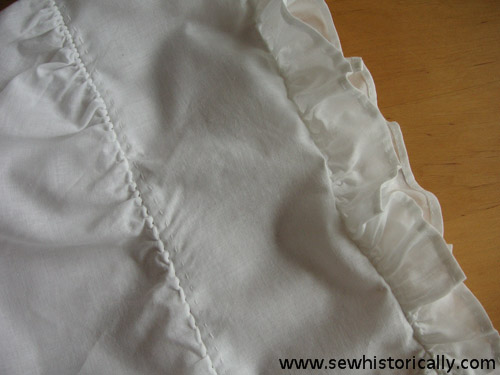
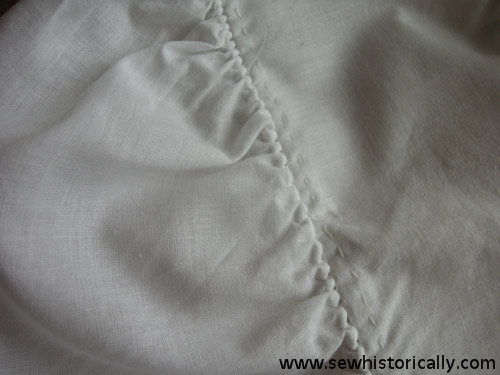
Sew the frill to the front of the brim, again with overcasting stitches from the inside, like you’ve attached the crown to the brim. (Close-up of cap frill, rolled whipped gathers, and running stitches; woman’s cap with whipped ruffle)
Attach the cap ties with running stitches at the bottom of the brim on the inside or outside.
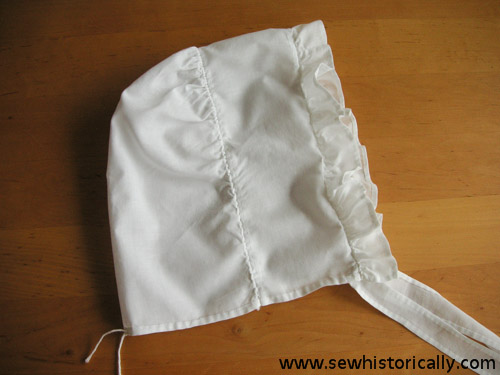
Insert a cotton string into the hem of the crown piece and secure it at the seam between crown and brim.
Then gather the crown slightly and tie a bow, like here.
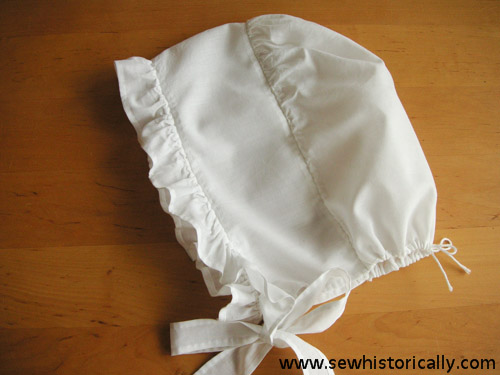
And your mid-Victorian day cap is finished! 😀
Victorian Day Cap just what I’ve been looking for to go underneath the Victorian Bonnet I have made. Already for the Christmas Rochester (Kent) Dickens Festival, where I will be joining other Members of the Rochester & Chatham Dickens Fellowship all wearing Dickensian costume.
I’m glad you found the tutorial helpful. 😀 Do you have a blog? I’d love to see a picture of your finished Victorian bonnet and cap.
Great instructions, especially the fitting!
I’d love your opinion on whether the way I’ve been doing the rolled whipped gathers is easier or faster than the way you do it (as far as I can tell from the pictures). https://www.youtube.com/watch?v=A8NIHfqpBDI&t=5s&list=PLMKggOeranlQ3D8T9kpk7VjbaL2W8vGp2&index=5
I would also suggest very narrow woven tape instead of string in the casing. It’s less likely to tangle up, in my experience.
Thank you for your comment. 🙂
The video you linked isn’t for rolled whipped gathers (you’re folding the fabric, not rolling it). In the Victorian and Edwardian era, rolled whipped gathers are made differently. The source I linked explains it quite well: To make rolled whipped gathers, the fabric edge is rolled tightly between the thumb and forefinger. Then overcast the rolled edge and draw the thread tight. It might seem difficult at first; but it’s a very easy and fast way to make ruffles once you’ve practiced it a bit.
Yes, both narrow tapes and string was used at the back of the neck. Thanks for mentioning it.
I really don’t know how to sew but am having a go at this bonnet.
There’s something I don’t understand.
If the brim piece is 50 cm long and the crown piece 29 cm how can it be that you gather the crown piece to fit the brim when the brim is much longer?
Thanks for your help!! 🙂
29 cm is measured straight across of the crown piece; if you measure along the curve of the crown piece, it’s much longer than 50 cm.
Hope this helps! 🙂 Let me know if you have any further questions.
Thank you very much for these excellent instructions. I have just made my Granddaughter a cap as per your instruction for her Victorian day at school and it has turned out perfectly and looks quite professional!
I’ve also found he rest of your website interesting and helpful.
Thanks so much for your lovely comment, Sue! 🙂 I’m glad it was helpful!
Love you tutorial…I’m wondering.. ..when you whip stitch the crown to the brim (and the brim to the ruffle) are you putting the check right sides of the fabric together…or the wrong sides together. Thanks!
Thanks, Nancy! 🙂 I put the right sides together.
I don’t see a step where the brim piece is hemmed. Do I just hem it on all four sides?
Yes, that’s right – just hem the brim piece on all four sides.
Any suggestions on how to make it gather better? I was having a hard time with the whip stitches and getting it to pull tight enough. I had to sew on a extra piece to my brim because it wasn’t long enough for the crown because I couldn’t get the crown gathered anymore. Otherwise it turned out pretty well for a first attempt. If I ever make another one I’ll make the crown more roomy because if I had a bun it wouldn’t fit but because I have a pixie cut right now it fits fine. I think I’ll also make the ruffle wider and try to gather it more because it didn’t ruffle much.
I don’t know what fabric you used but thin (sheer) fabric is a lot easier to gather. For my cap, I used the sheerest cotton fabric that I could find.
Oh wow, thank you so much for this. I’m new to sewing historically. My granddaughter is passionate about history and would love me to sew anything for her . I’m excited now ?
Thanks so much, Rosanna! I’m glad you find it helpful! 😀
Thank you so much for putting this pattern online and your great instructions and links to other resources. I really enjoyed making this for my daughter.
Thank you so much, Jenny! 😀
Very excited about this project and hope to try next week Thank you
You’re welcome! 🙂 Thanks for stopping by, Marilyn!
I think it is amazing that you are making historically accurate clothing. I intend to try making your day cap. What a sweet project. I am thoroughly impressed with your blog and the wonderful articles of clothing you make. Wow.
Wow, thanks so much for your sweet comment! 😀
I have been a civil war reenactor for 23 years. I’m now 64 so I want to make a day cap appropriate for my age. This cap is so cute. And the instructions look fairly easy. Thanks!
Thanks, I’m glad you like it!
I saw photos of women in the 1840s – 1860s without a day cap and some with day cap. So under what condition do Victorian women wear day cap and don’t? Also, what is the difference between day cap, morning cap, and is there an evening cap? Thank you so much!
In the 1840s almost all women – young and old – wore day caps, whereas in the 1860s usually only older women still preferred to wear day caps. Day caps and morning caps are the same. And there were also evening caps or headdresses which were worn at formal dinners and balls. Evening headdresses were small lace caps trimmed with artificial flowers and beads.
Thank you! Such helpful information. But how come there are still photos in 1840s where women (especially the wealthy) would wear no cap?
And please tell me movies like Jane Eyre left out the day cap because it’s a movie. I saw many movies and shows where only the servant or elderly women wear the cap but other women would not.
Wealthy women were the fashion leaders : they were the first to wear no day caps and other women followed their example.
And movies are never historically accurate: Filmmakers have their budget to consider and they think that viewers don’t recognize the leading actors if their heads are covered. For example, a Victorian woman like Margaret in North & South would always wear a bonnet outside her home. However in the movie she always never wears one.
Great tutorial….although I didn’t do the hand stitching (except the eyelets) I still really love how it looks!!
Thank you! 😀 I’m glad you like it!