In the Edwardian era, lace was often inserted with a rolled hem by hand. This creates a secure and neat finish that is almost invisible on the right side of the fabric.
Related: 6 Ways How To Insert Lace
How To Insert Lace By Hand
You’ll need:
- cotton lace – like bobbin or Valenciennes lace
- thin cotton fabric – like batiste, lawn or muslin
- cotton sewing thread matching the color of the lace or fabric
- needle
- scissors
- optional: sewing machine
Step 1: Sew The Lace To The Fabric
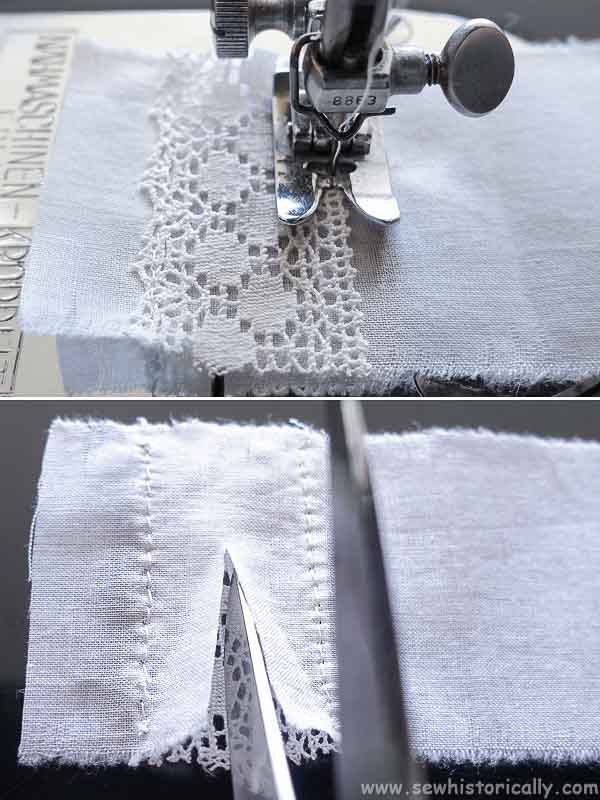
Pin or baste the lace to the fabric. Then sew the lace to the fabric along both edges with straight stitches on your sewing machine or with running stitches by hand. Sew both rows of stitches in the same direction to prevent the fabric from distorting.
If you use delicate handmade lace, it ‘should be sewed in place by hand with fine running stitches’ (School Sewing Based On Home Problems, 1916).
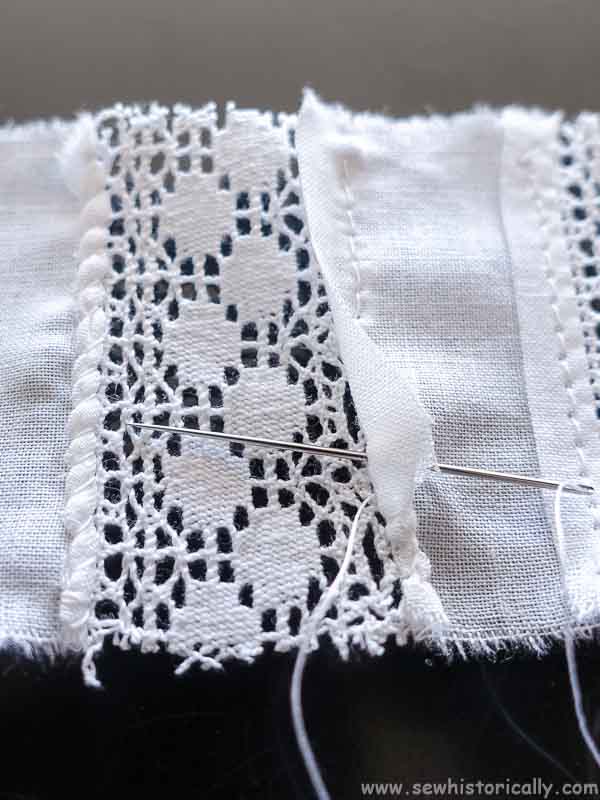
Turn the fabric to the wrong side. And trim the raw edges of the fabric to about 1/8 – 1/4″ (3 – 6mm). Be careful that you don’t accidentally cut the lace.
Step 2: Finish The Raw Edges
Now finish the raw edges of the fabric with a tiny faux hand-rolled hem: Sew closely spaced overcast stitches close to your stitching lines and draw them tight.
Related: Overhand, Overcast, Hem & Whip Stitch – What’s The Difference
This faux rolled hem was a popular way to finish the raw edges on lace inserts in the Edwardian era. On the wrong side it looks like a rolled hem. And on the right side it’s almost invisible.
‘The edge has the appearance of being rolled.’ (Clothing For Women: Selection, Design, Construction, 1916)
Beside being a neat finish, it’s also a very secure way to insert lace.
Related: How To Make Edwardian Net Applique