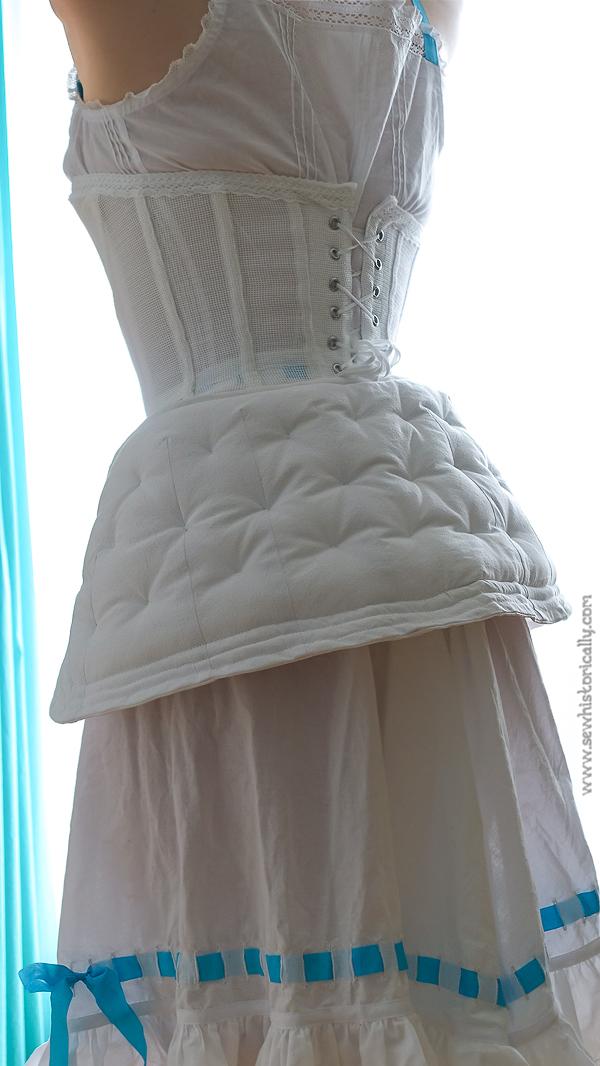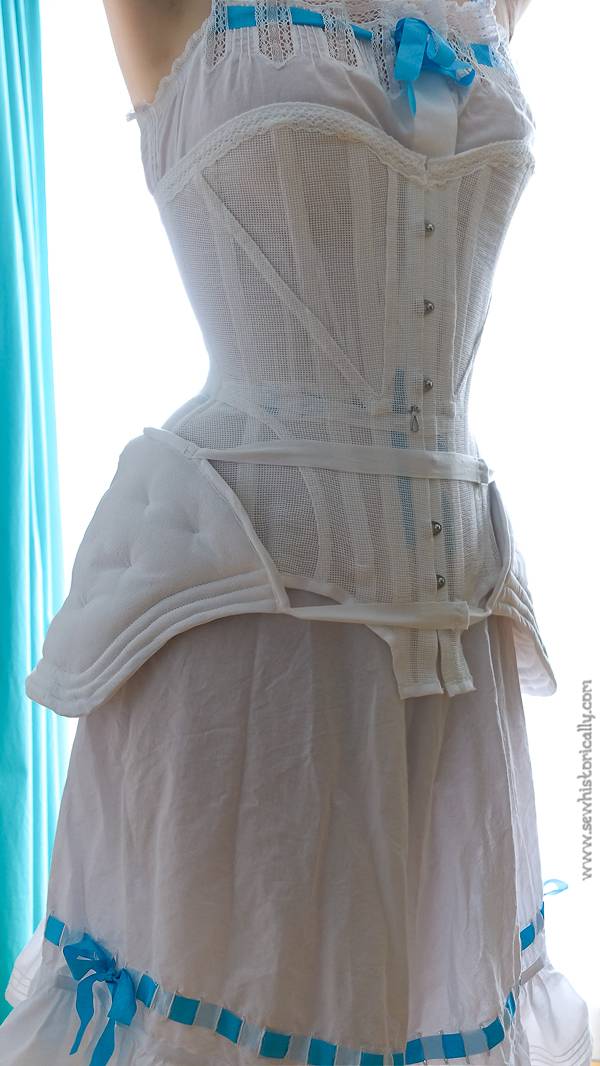
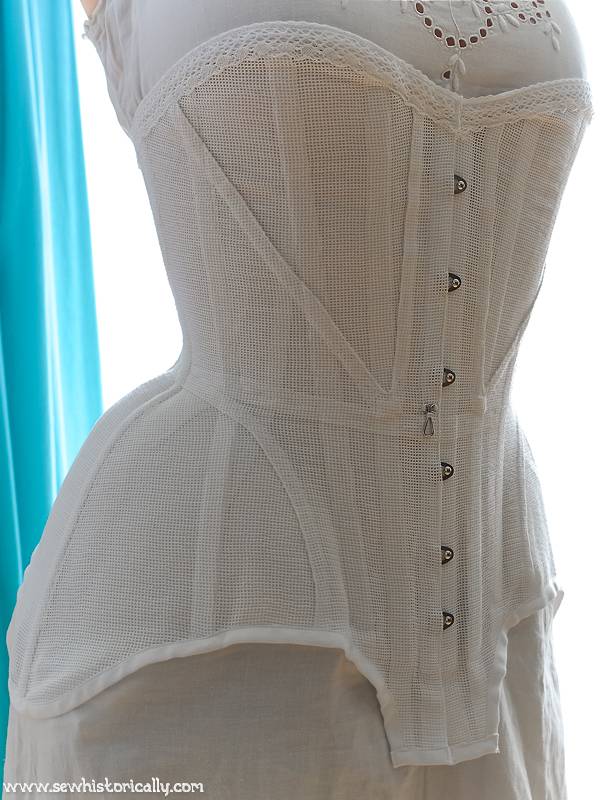
My Edwardian hip pad is inspired by antique Edwardian hip pads, like the Scott Ventilated Hip Pad & Bustle. But for a better fit under Edwardian straight-front corsets, I actually used the bottom part of an antique corset to draw the pattern! So my Edwardian hip pad pattern might look different than the typical crescent-shaped Edwardian hip pad patterns that are sold today. But antique Edwardian bustle pads came in various forms like this or this antique hip pad. And I find that this shaped hip pad fits better under Edwardian straight-front (aka S-bend) corsets: It fills out the bum, creates the fashionable wide hips of the Edwardian era without destroying the fashionable straight-front of Edwardian corsets.
‘Are you thin? Fill out your back and hips and give them shape with my Parisian Perfect Form […] Even your dressmaker cannot detect it. It is light, cool, sanitary, soft, flexible and will give you well rounded hips in any gown.’ (Edwardian Hip Pad Ad)
You’ll Need:
- pre-washed, ordinary white cotton fabric (like cretonne or lawn) or colored silk fabric (like habotai)
- stuffing *
- white cotton twill tape
- cotton sewing thread
- optional: metal grommets
* As stuffing for your Edwardian hip pad, you can either use historically correct, natural stuffing like down, horsehair, kapok fill or cotton batting; or you can use modern stuffing like polyester stuffing. I wouldn’t recommend using fabric scraps: I tried it and it was heavy and hot. For this hip pad I used cotton batting. Cotton batting makes the hip pad slightly stiffer than polyester stuffing.
Related: How To Sew A Bum Roll
The Edwardian Bustle Aka Hip Pad
Hip pads in the Edwardian era were usually made of white cotton fabric, colored or black mercerized cotton fabric (like sateen) or colored washable silk fabric (like habotai silk).
‘Though the return of the hoop skirt has been nothing more than a rumor, yet that very distant relative of the dreaded crinoline- the bustle – is already among us, and is creating quite a commotion in the fashion world.
It’s just a little bustle, and it has really made its appearance because it was needed. Think of all the women whose backs are hollow just below the waist line, and who need some little elevation there to make their skirts hang as they should.
The new bustle has much in its favor – daintiness and lightness. It is filled with the finest of feather down, and covered with either sateen or silk. It is correctly shaped, and is stiffened just sufficiently to make it a bustle and to hold its form. As there is nothing heavy or heating about it, it is quite hygienic enough to be thoroughly recommended.’ (Women’s Home Companion January, 1906)
How To Fit The Hip Pad Pattern
(Pattern coming soon – stay tuned!) The ends of the hip pad should sit over your hips (where the hip gussets of your Edwardian corset are): the hip pad should not be so big that it meets at the front. To make the Edwardian hip pad pattern bigger or smaller, add or remove a few centimeters at the center back of the pattern.

How To Sew An Edwardian Hip Pad
1. Print out the pattern. (Pattern coming soon)
2. Cut out the pattern twice from cotton fabric.
3. Sew the darts. Then press all (side) darts towards the front.
4. With right sides together, sew the long seams closed. Leave a small opening at the waist seam for stuffing the Edwardian hip pad. And clip the curved seam allowances (picture 1). Then turn the hip pad inside out.
5. Now stuff the hip pad (picture 2). And sew the opening closed with overhand or mattress stitches by hand.
6. Bind the waist seam with twill tape (picture 3): The ends of the tape are used to tie the Edwardian hip pad around your waist.
Cut a piece of cotton twill tape long enough to reach around your hips and long enough so that you can tie the ends of the tape into a bow. Pin the center of the tape to the center of the hip pad. Pin the tape along the top edge of the hip pad: Fold the binding over so that half is on each side of the edge finishing the raw edge of the hip pad.
Instead of with a bow you can also close the hip pad with hooks and eyes. In this case, cut the tape shorter reaching only around your hips. Optional: You can add another piece of tape about 15cm above the first tape ends so that you can tie the hip pad more securely around your hips.
7. Quilt the layers of the Edwardian hip pad together with about three to five rows of stitching along the bottom edge of the hip pad (picture 4). This secures all layers in place so that the stuffing doesn’t shift around as you wear it or wash it.
8. Now tuft the hip pad like on this antique 1900s hip pad: this also keeps the filling from shifting. Mark the placement of the tufts with a pencil or pin or just eyeball it. Cut a length of thick cotton thread such as hand sewing thread or crochet yarn. To make the first tuft: Pierce the needle through all layers from the back of the hip pad. Leave a short tail of thread. Make a small stitch and insert the needle again from the front to the back. Tie the tails of the thread into a square knot (picture 5). Then cut off the thread. And continue to tuft the hip pad (picture 6).
9. Optional: You can add 5 metal grommets. These grommets were added for ventilation in the Edwardian era. You can also add a ruffle or lace at the bottom of the hip pad like on this antique Edwardian hip pad.
If you have questions, please don‘t hesitate to ask them in the comments below.