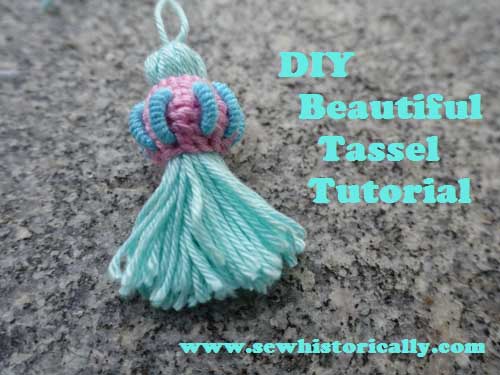
In this tutorial I’ll show you how to make this decorative tassel.
You’ll need:
- yarn in different colors
- needle
- scissor
- sewing thread
- a small piece of wool felt
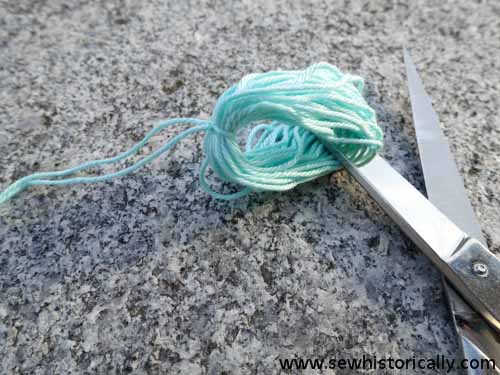
First make an ordinary tassel: Wrap the yarn round your hand. With a short piece of yarn tie a knot to secure the loops. Then cut the loops.

Wrap the small piece of wool felt round the tassel and sew it in place.
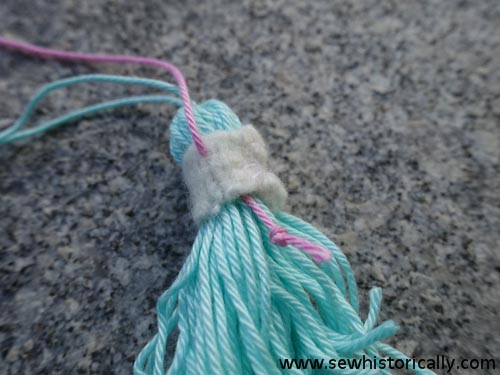
Cut a long piece of yarn to cover the wool felt. Tie a knot at one end of the yarn and hide the knot behind the wool felt.
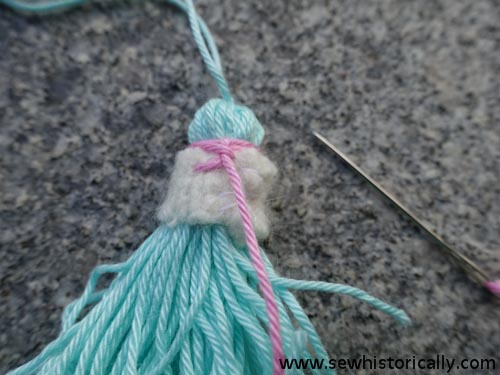
Wrap the yarn three times round the tassel above the wool felt.

Now begin to cover the wool felt with buttonhole stitches.

Continue to sew buttonhole stitches round the tassel till the whole felt piece is hidden. Make less buttonhole stitches in the last row.

To secure the thread, sew 2 or 3 times through the head of the tassel before you cut the yarn.
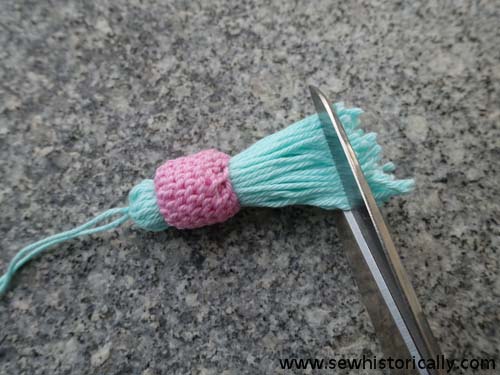
Now trim the uneven yarn at the bottom of the tassel.
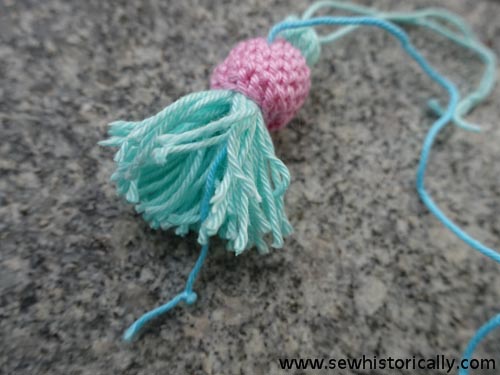
Cut another long piece of yarn in another color, and hide the knot again.

Sew bullion stitches round the tassel head. For each bullion stitch wrap the yarn about twelve times round the needle. When all bullion stitches are finished, secure the yarn again inside the tassel head.
When you liked the tutorial, please share it on Pinterest, Facebook, Twitter etc. Thank you!

This is a craft that I can actually do. Thanks for sharing.
Thanks for stopping by, Elise! 🙂
That’s really clever! Great tutorial. Thank you for sharing.
I made a tassel for my embroidery ….. didn’t have a clue where to start, although I made it eventually, and so I was even more interested to read your method for a woollen tassel.
I hope it’s OK to Pin for future use!
Barbara x
Thanks for pinning, Barbara! 🙂
I love tassels!!! This is so different! Thank you for sharing at Sweet Inspiration Link Party !
Thanks, Christina! 🙂
I enjoyed teaching children how to make a tassel at camp last week. But I love the extra pizzazz you’ve added to yours! Thank you for the ideas and the tutorial. Pinning!
Thanks for pinning, Linda!
This is a beautiful tassel. Thanks for explaining it in such a clear tutorial with plenty of photos. I think anyone could follow your directions. Tassels like this are so useful in home decor, DIY jewelry, or fashion.
Carol (“Mimi”) from Home with Mimi
Thank you, Carol!
My grandmother taught me to make tassels as a girl. Thanks for reminding me of the sweet memory! Thank you for sharing @Vintage Charm!
I’m glad it brought back happy memories! 🙂
Thank you for sharing a tutorial for this tassel. So nice. I am pinning as I am sure I will be making these for various home made blankets I want to make this fall.
Thanks for pinning! I’d love to see yours when you make them! 🙂
What a creative way to make a tassel! You really elevate a simple tassel craft into something beautiful and crafty. So lovely!
Thanks, Jelica!
I’ve always wanted to make some tassels and your tutorial has given me the incentive to make something better looking than just using some plain wool/thread – thanks for showing me how:)
You’re welcome! I’m glad you liked it! 🙂
It is so beautiful, that I thought it would be much more complicated than that! I love it.
🙂 gwingal
Thanks, Nikki! 🙂
I have a question about this type of tassel – can something like this be done in silk to make a tassel for Victorian clothing? I’ve been having a hard time finding tassels in the quality I want and I only need three.
If I were to do something like that where would I find silk floss to do it in?
Yes, you can use silk to make this tassel. 🙂 For very small tassels you can use silk sewing thread. Or use silk embroidery floss or silk yarn (for crochet or knitting) to make larger tassels.