‘There are certain types of girls and women to whom violets seem to belong.’ (Ruth Wyeth Spears, 1920s)
In this tutorial I’ll show you how to make authentic 1920s ribbon violets and how to wrap wire stems with embroidery floss.
You’ll need:
- lilac ribbon
- yellow sewing thread
- green embroidery floss
- thin wire
- needle and scissor

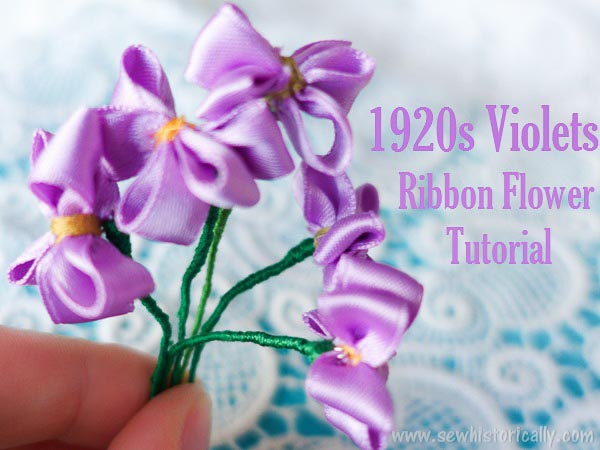
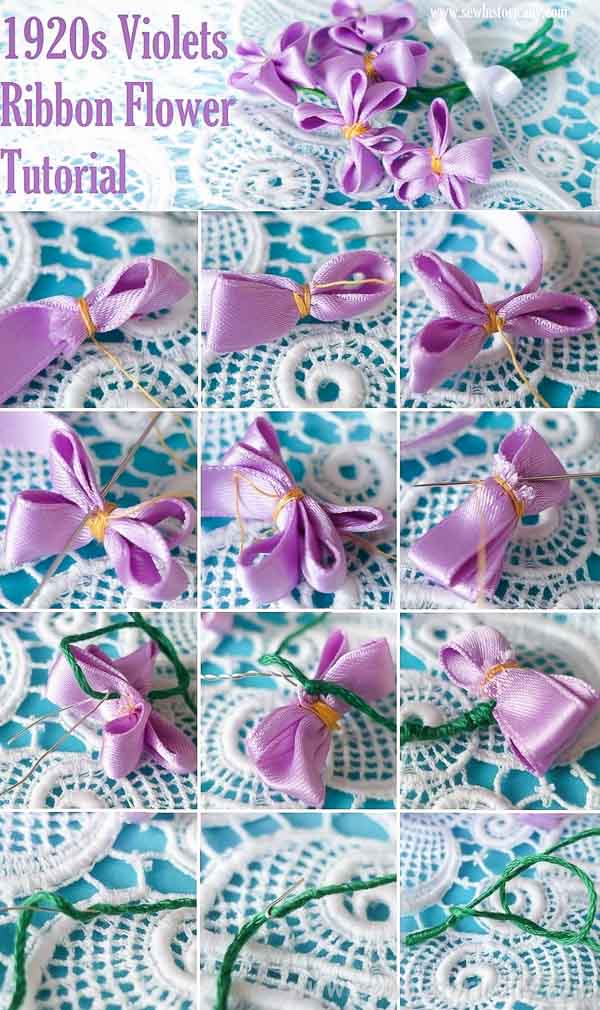
1920s Violets – Ribbon Flower Tutorial
Original 1920s instructions by Ruth Wyeth Spears: ‘To make a bunch of violets […] you will need three and a half yards of half inch wide violet colored taffeta ribbon, a few strands of yellow embroidery floss, a yard and a half of fine lace wire for stems and a bit of tinfoil to wrap the stems.
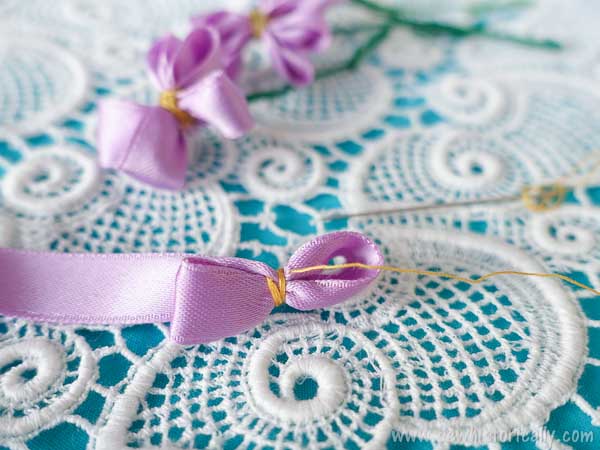
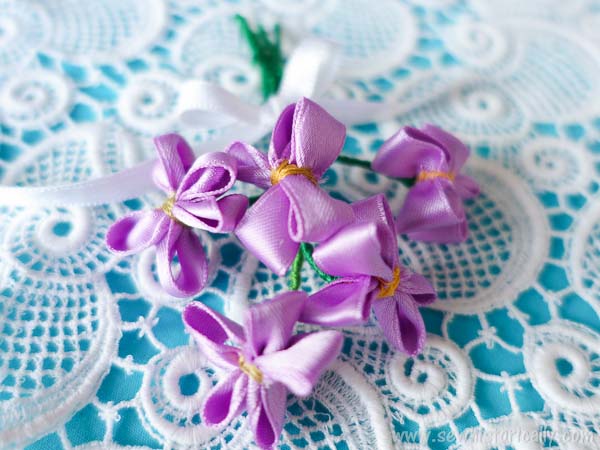
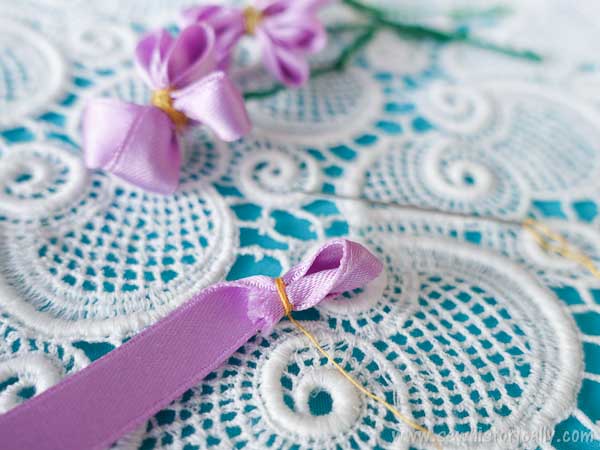
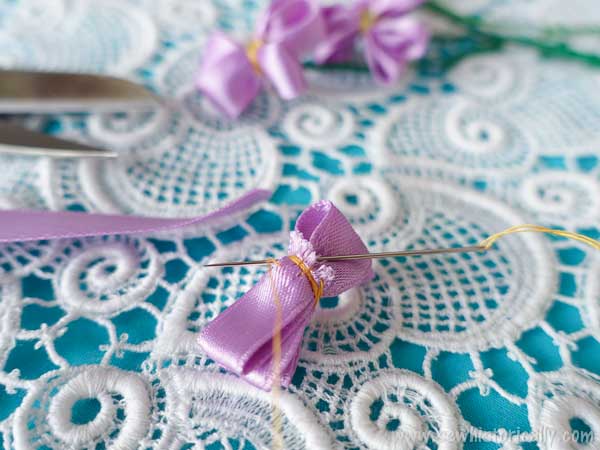
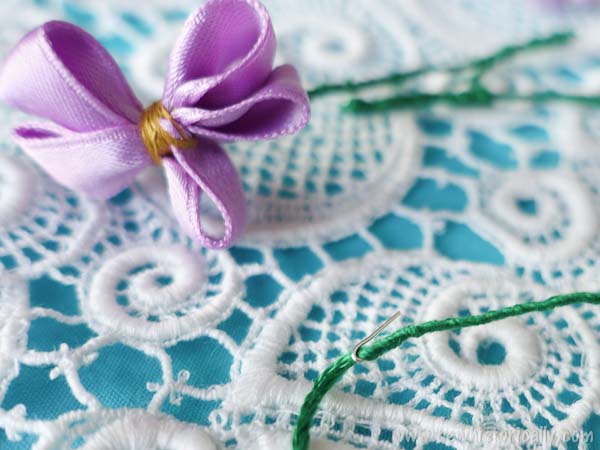
A violet has five petals – two small ones at the top, a pair of larger petals below these, then a single one at the bottom. In the ribbon violet these are all made of loops, and the loops are bound in the center with the yellow floss, which simulates the center of the flower. Make the two top loops first […]

then the next two […]
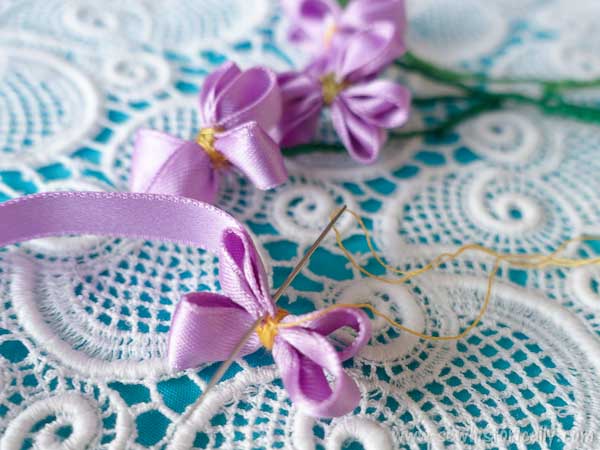
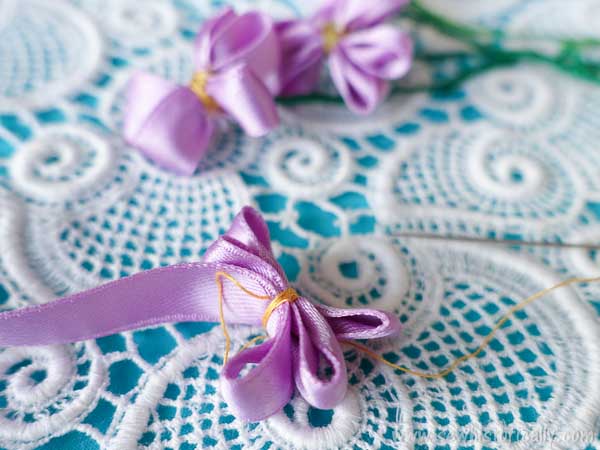
and add the bottom one […]
Cut the stem wires about four inches long. If you have not been able to get green wire, black will be inconspicuous or white may be colored green with water colors. Bend the end of the wire as at D and sew it to the back of the flower as at E. Bind the bunch of flowers together and the stems with the tinfoil as at F. ‘ (Ruth Wyeth Spears, 1920s)
How To Wrap Wire Stems With Embroidery Floss
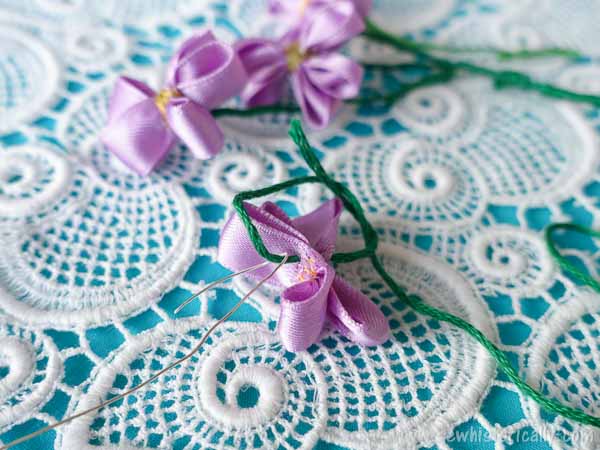
Bend the wire into a hook and knot it to the violet with the green embroidery floss.
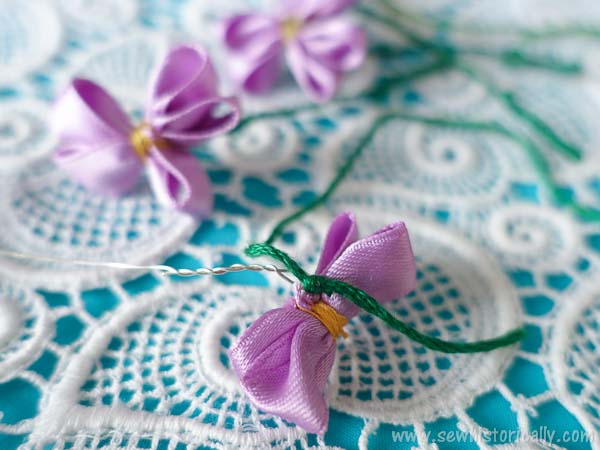
Twist both ends of the wire together.

Wrap the embroidery floss around the wire.
Bend the end of the wire into a hook.

Wrap the embroidery floss back around the wire till the wire is completely covered.
Tie three knots around the wire and cut off the embroidery floss.

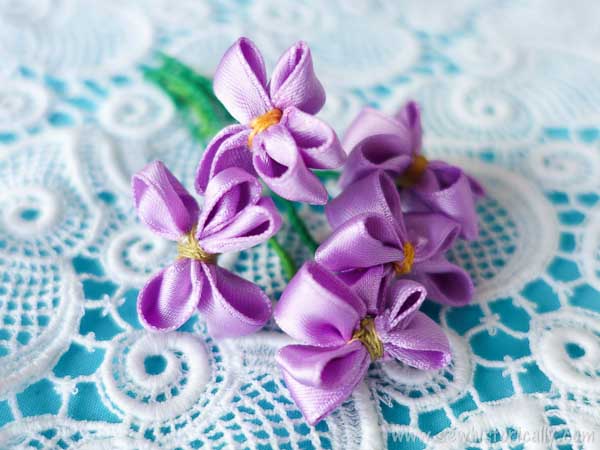
Put the violet nosegay into a vase or use the ribbon violets to trim a cloche hat or 1920s summer dress.
If you enjoyed the tutorial, please pin it! 🙂
I really like these. Thank you for the how-to. “_”
Thanks, Kate! 🙂
These violets are soooo pretty! Perfect for embellishing, or as a gift to a young lady in a small vase.
Thanks so much, Alexandra! 🙂
Ooo Lina, these are so sweet. What a lovely idea.
Thanks so much, Julie!
How pretty are these, I hopped over from Curly Crafty Mom’s linkup. I also have a Thursday Linkup I would love for you to join https://www.alabouroflife.com/brown-tweed-and-leather. Please come over and join the fun
Thanks, Linda! And thanks for the invitation!
Oh these are adorable! I’m absolutely making these for May Day! Shared on Facebook and pinned as well.
Thanks so much for sharing and pinning!
This is just amazing! I really like the floral pattern. How cute is this 🙂
Thanks for sharing with us 🙂
Khadija
Thanks, Khadija!
These are so pretty. I can just imagine my great-grandma making these with her daughters 🙂 Thank you for sharing!
Thanks, Sheri!
Oh so pretty and delicate!
Thanks, Eva!
lovely and easy to do- thanks for joining the Bloggers Pit Stop
Thanks, Menaka!
I adore violets, Lina, so much so that I think I might be one of the women to whom Ruth Wyeth Spears may have been referring! My late mother adored them too, and she was born in the twenties….Your Ribbon Flowers are gorgeous. I’ve scheduled this tutorial to pin. It’s so well explained and I think even someone like me could follow along to make a beautiful bouquet. Thank you so much for sharing, and for being a part of the Hearth and Soul Link Party.
Thanks so much, April! 🙂
I love your violets! And the fact that this idea has been around since 1920 is fabulous. Thanks for linking up at OVER THE MOON LINK PARTY. I am featuring this post on next weeks link party which will go live on Sunday Apr 29 at 5 pm central. Please stop by to see your feature and link up again!
🙂 gwingal
Thanks so much for featuring me, Nikki! 🙂
I am confused with the need for tinfoil. In directions it states to wrap the wires with green embroidery thread. Then I see that foil can be used to wrap wires. At what point is this done?
I used green embroidery thread instead of tinfoil but you can use tinfoil instead if you want. I hope this helps! 🙂
This lovely post is a CREATIVE feature on the May You’re the STAR blog hop: http://www.godsgrowinggarden.com/2018/05/youre-star-week2-creative-may-2018.html
Thanks
Angie
Thanks for featuring me, Angie! 🙂
UH-dorable! If I had a Pintrest account, I’d definitely pin it. If I make these one day, I’ll be sure to tag you in the pics!
Thank you! Glad you like them! 😀